From the ETL Job Schedules tab, you can create job schedules. To create:
- Click the New Schedule button to bring up the New Schedule dialog
- Enter the properties of the new job schedule
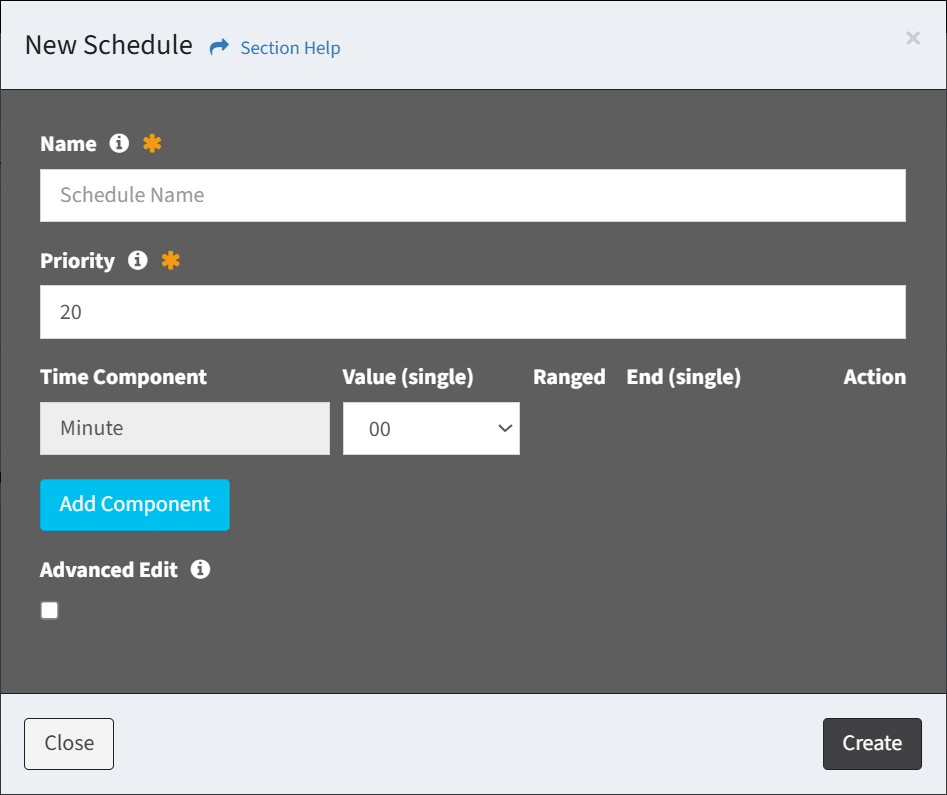
- Name – Name of the job schedule (required)
- Priority – Choose the order the job schedule will run at the designated frequency (required)
- Choose the frequency the job schedule will run (required)
- Time Component – Select the time component (Minute, Day of Week, Month, Day of Month, Hour)
- Value – Select the value of the time component (e.g., 30, Monday, October, 6, 23)
- Select Any to match any value
- Ranged – Select to define a range for the selected time component (e.g., Monday through Friday)
- End – Select the end value of the range for the selected time component
- Action – Delete existing or new rows
- Add Component – Add new rows for additional time components
- Advanced Edit – Check to edit the cron string manually (optional)
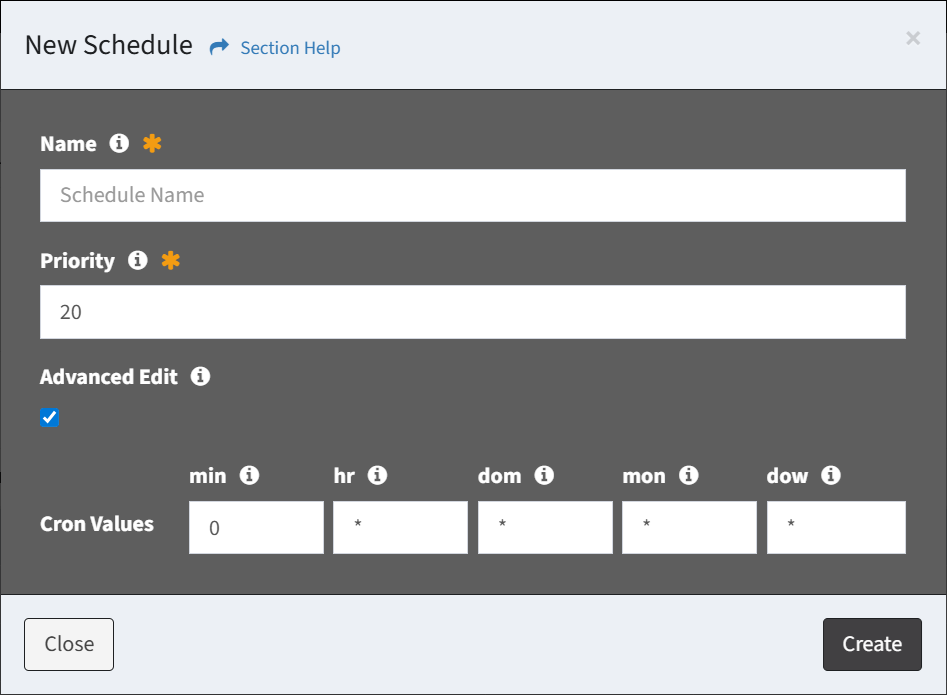
- Cron Values
- min – Minute values of the cron string (0-59)
- hr – Hour values of the cron string (0-23)
- dom – Day of the month values of the cron string (0-31)
- mon – Month values of the cron string (0-11) (0 = January, 1 = February, etc.)
- dow – Day of the week values of the cron string (0-6) (0 = Sunday, 1 = Monday, etc.)
- Special Characters
- * (asterisk) – Select all possible values in a field (e.g., place * in the hr field to run the task every hour)
- , (comma) – Used to separate multiple values (e.g., 0,3,5 in the dow field will make the task run on Sunday, Wednesday and Friday)
- – (hyphen) – Used to set a range of values (e.g., 10-15 in the dom field will run the task from the 10th to the 15th day of the month)
- / (separator) – Used to divide values (e.g., */10 in the hour field will make the task run every 10 hours)
- Click the Create button when finished to create the job schedule. Click the Close button to cancel the operation.