From the Inbound Jobs tab, you can create new inbound jobs. To create:
- Click the New Inbound Job button to bring up the New Inbound Job dialog
- Enter the properties of the new inbound job (available job fields differ by connector)
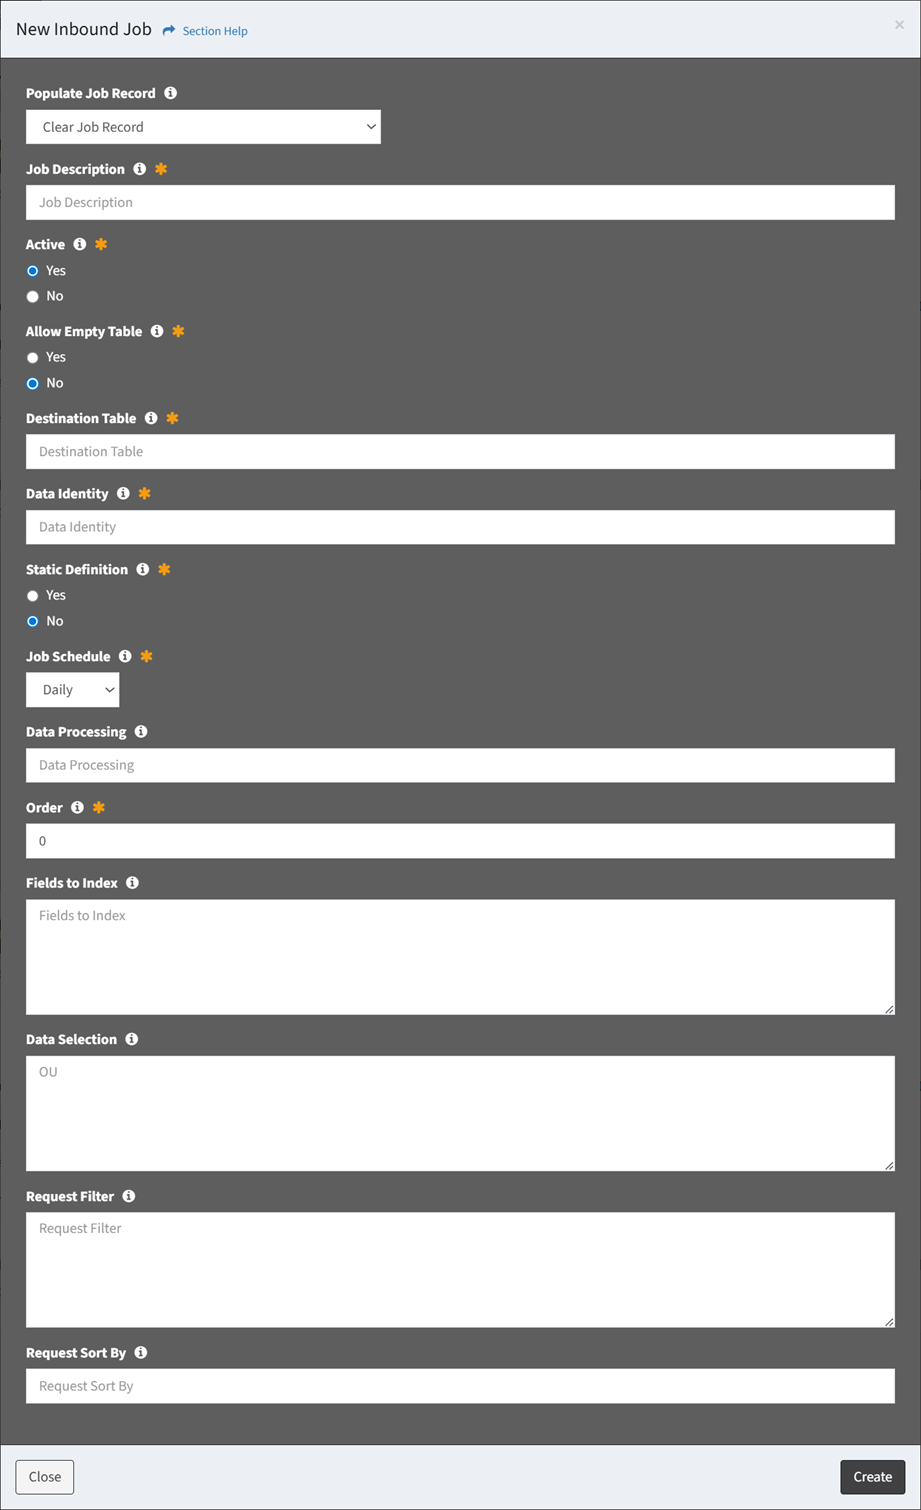
- Populate Job Record – Choose how to populate the job (required)
- Clear Job Record – Start with an empty record
- Use Template – Start with a template job
- Clone Job – Start with a clone from an existing job
- Job Description – Description of the job (required)
- Activate – Choose if job is enabled (required)
- Allow Empty Table – Choose if an empty table is allowed (required)
- Destination Table – Name of the destination table (e.g., my_table_cm_computer) (required)
- Data Identity – Identity of the data for dashboards (e.g., cm_computer) (required)
- Static Definition – Choose if the table definition is static (required)
- Job Schedule – Choose the frequency the job will run (required)
- Hourly
- Daily
- Weekly
- Custom
- Data Processing – Processing of the data (optional)
- Future field to be used for running a process against data
- Order – Choose the order the job will run at the designated frequency (required)
- Fields to Index – Fields to index (optional)
- Data Selection – Connector specific data selection command of the job (optional)
- Data Selection URL – Data selection URL of the job (optional)
- Request Filter – Fields to filter from the job (AD only) (optional)
- Request Sort By – Field to sort the job by (optional)
- Request Limit – Request limit of the job (Druva, ServiceNow and CrashPlan only) (optional)
- Request Fields – Fields requested by the job (ServiceNow only) (optional)
- Click the Create button when finished to create the inbound job. You will be redirected back to the Inbound Jobs tab. Click the Close button to cancel the operation.
- The new inbound job function is only available to users in the Administrator security group