
Search Knowledge Base by Keyword
Edit Mapping
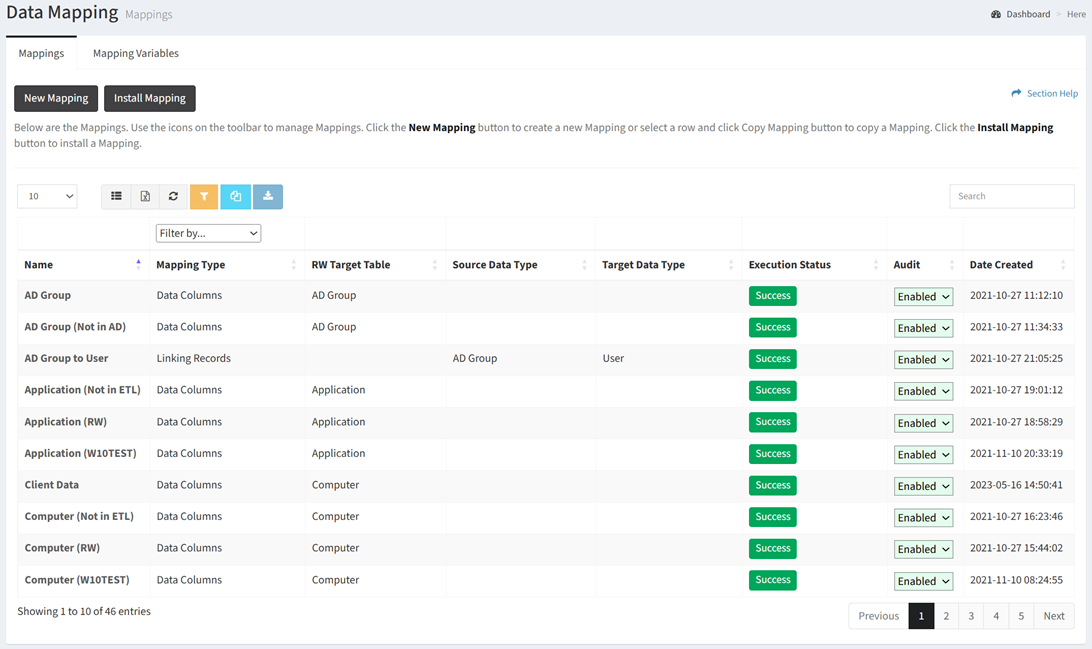
From the Mappings tab, you can edit mappings. To edit:
- Click the hyperlink of the Name field to edit the mapping
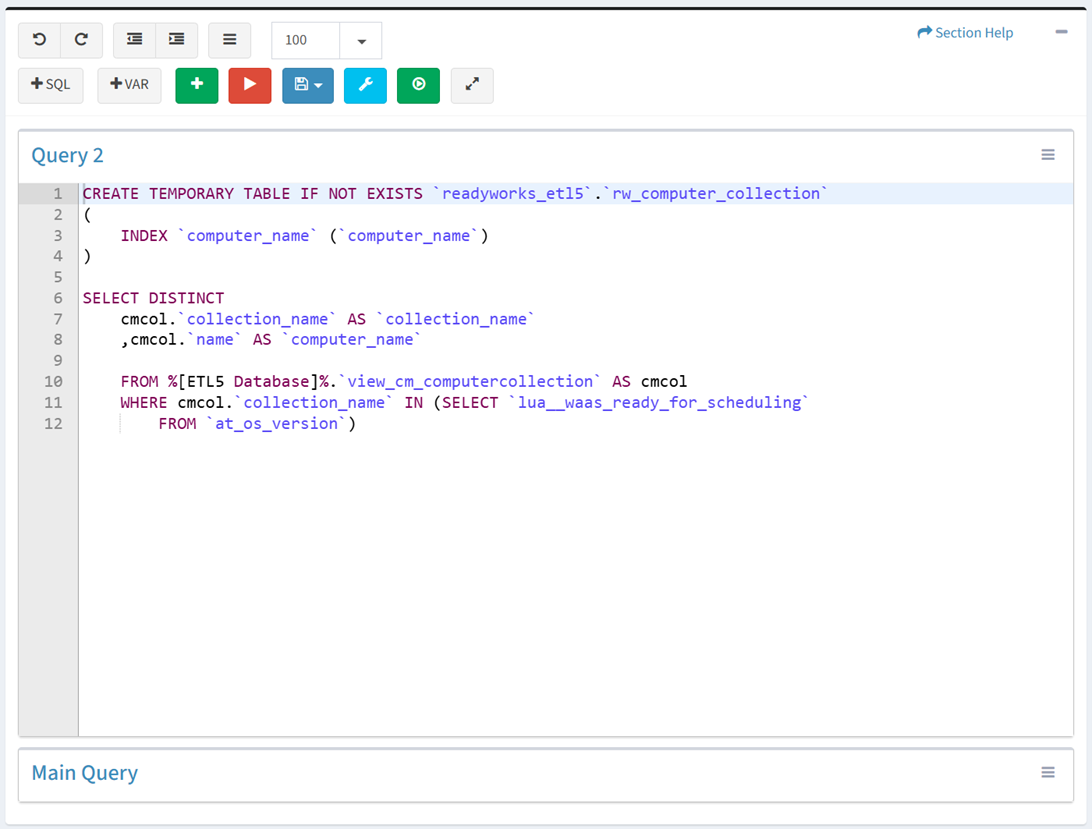
- Edit the main query of the mapping in the query window. Data mapping can access the connected ETL database and the ReadyWorks database.
NOTE: When using SQL functions for columns, be sure to use aliases signified by the keyword AS (see Line 2 in sample query below).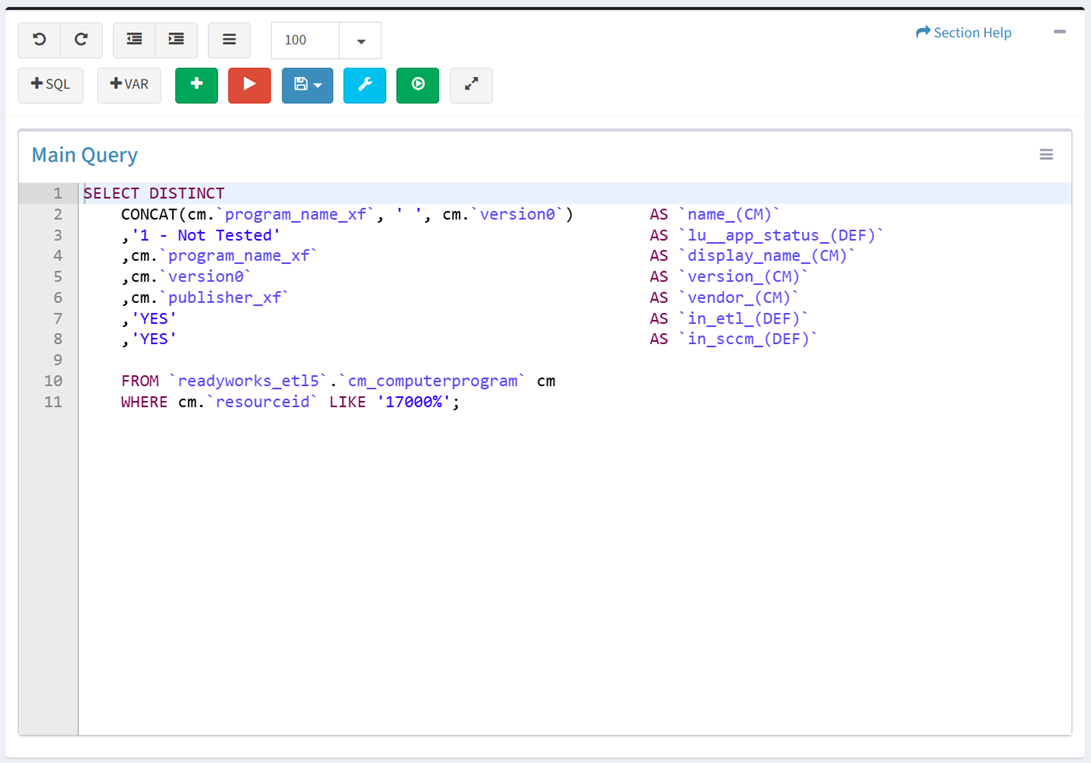
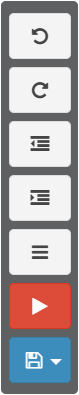
- Use the editing buttons to format the query
- Undo – Undo the last edit

- Redo – Redo the last edit that was undone

- Block Outdent – Remove an indent from a line or block

- Block Indent – Set a line or block in from the margin

- Comment – Comment out a line or block

- Limit Result – Select the number of rows to display from the drop down (100 (default), 500, 1000, All)

- Theme – Color theme of query (Theme1, Theme2)

NOTE: Theme was deprecated in version 7.6.0912. - Add SQL – Add sample SQL to the query

- Add Variable – Add mapping variable to the query

- App Filters Variable – Insert variable %[etl_app_filter__cm.name]% to filter a query based on App Filters
- Example Query: SELECT * FROM readyworks_etl5.cm_computerprogram cm WHERE %[etl_app_filter__cm.name]%
- App Filters Variable – Insert variable %[etl_app_filter__cm.name]% to filter a query based on App Filters
- Undo – Undo the last edit
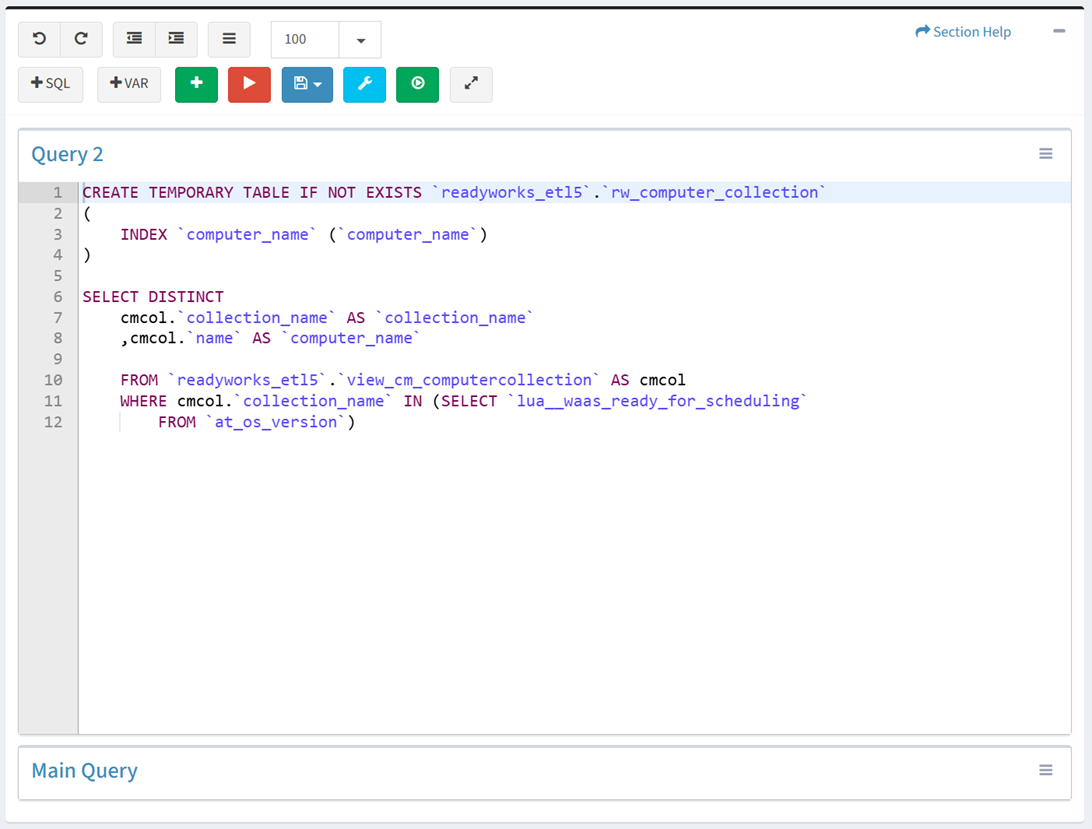
- Click the
 button to add a helper query. Data mapping can access the connected ETL database and the ReadyWorks database.
- Click the name of a query to expand or minimize the query window

- Click the
 button to run the query and preview the output before saving
- Select the number of rows to display from the drop down (100 (default), 500, 1000, All)
- Select the number of rows to display from the drop down (100 (default), 500, 1000, All)
- Click the
 button to bring op the Settings dialog
- Configure the mapping settings and then click the Close button
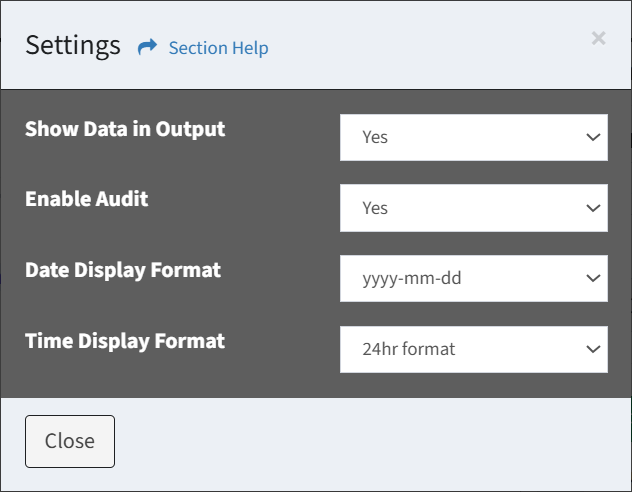
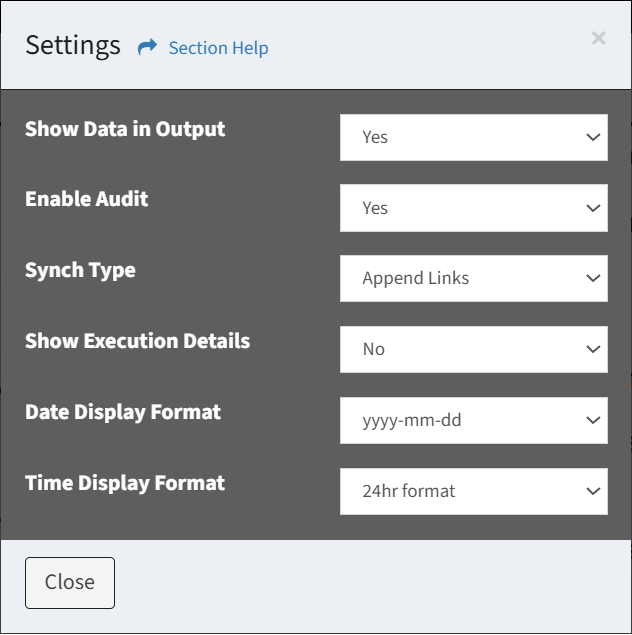
- Show Data in Output – Choose if data is displayed in output
- Enable Audit – Choose if auditing (logging) is enabled or disabled
- Date Display Format – Date display format of the user (yyyy-mm-dd, mm/dd/yyyy, dd/mm/yyyy, dd mon yyyy)
- Time Display Format – Time display format of the user (24hr format, 12hr (AM/PM) format)
- Synch Type – Select the type of synch (Linking Records, Linking Waves, Unlinking Waves, Linking Tasks, Unlinking Tasks)
- Reload Links – Drop and reload links for the selected data type
- Append Links – Append new links for the selected data type
- Show Execution Details – Choose if verbose output is displayed during execution (Linking Records, Linking Waves, Unlinking Waves, Linking Tasks, Unlinking Tasks)
- Configure the mapping settings and then click the Close button
- Click the
 button to run the data mapping (as it would from a cron job)
 - Click the
 button to expand the query to full window mode. Click the
  button to exit full window mode.
 - Use the
 menu to manage queries
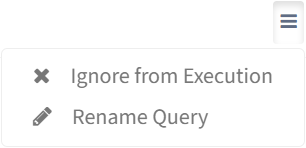
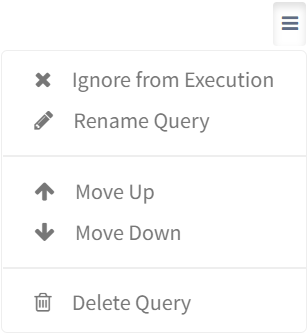
- Ignore from Execution – Ignore a query from execution
- Rename Query – Rename a query
- Move Up – Move a query up in the order
- Move Down – Move a query down in the order
- Delete Query – Delete a query
- Use the floating toolbar to format, run, and save the query when you are scrolled down
- Use the editing buttons to format the query
- View the results of the query in the Output window
NOTE: Encrypted data columns are masked to the end user when viewing the output. - Enter the mapping properties in the Mapping Properties window
- Mapping Name – Name of the mapping (required)
- Mapping Type – Type of the mapping (Data Columns, Linking Records, Linking Waves, Unlinking Waves, Linking Tasks, Unlinking Tasks)
- RW Target Table – Select ReadyWorks table that is the target of the mapping
- Source Column (ETL) – Select source column of the mapping
NOTE: The Name field of a data record cannot contain the string ” | “. - Target Column (RW) – Select target column of the mapping
- Allow Null / Zero – Choose if value of the mapping can be set to NULL or zero
NOTE: Enable Allow Null to overwrite data when the source changes to NULL (or directly through the SQL statement). When disabled, NULL values are skipped. - Conversion – Select conversion method of the mapping
- Boolean
- Checkbox
- Date
- Datetime
- FQDN
- GUID
- NetBIOS
- Use the
 menu to manage rows
- Move Up – Move a row up in the order
- Move Down – Move a row down in the order
- Ignore – Ignore a row
- Delete – Delete a row
- Add Row – Add new rows for additional mappings
- Remove All – Remove all rows
- Click the
 button to Quick Save or Full Save the mapping. A Quick Save does not run the query while a Full Save does and can take longer to save depending on the query.
NOTE: The RW Target Table is required to save a mapping.
Query
From the Edit Mapping page, you can manage the mapping queries. To manage the mapping queries:
- Edit the main query of the mapping in the query window. Data mappings can access the connected ETL database and the ReadyWorks database.
- Use the editing buttons to format the query
- Undo – Undo the last edit
- Redo – Redo the last edit that was undone
- Block Outdent – Remove an indent from a line or block
- Block Indent – Set a line or block in from the margin
- Comment – Comment out a line or block
- Limit Result – Select the number of rows to display from the drop down (100 (default), 500, 1000, All)
- Theme – Color theme of query (Theme1, Theme2)
NOTE: Theme was deprecated in version 7.6.0912. - Add SQL – Add sample SQL to the query
- Add Variable – Add mapping variable to the query
- App Filters Variable – Insert variable %[etl_app_filter__cm.name]% to filter a query based on App Filters
- Example Query: SELECT * FROM readyworks_etl5.cm_computerprogram cm WHERE %[etl_app_filter__cm.name]%
- App Filters Variable – Insert variable %[etl_app_filter__cm.name]% to filter a query based on App Filters
- Undo – Undo the last edit
- Click the button to add a helper query. Data mappings can access the connected ETL database and the ReadyWorks database.
- Click the name of a query to expand or minimize the query window
- Click the button to run the query and preview the output before saving
- Select the number of rows to display from the drop down (100 (default), 500, 1000, All)
- Select the number of rows to display from the drop down (100 (default), 500, 1000, All)
- Click the button to bring op the Settings dialog
- Configure the mapping settings and then click the Close button
- Show Data in Output – Choose if data is displayed in output
- Enable Audit – Choose if auditing (logging) is enabled or disabled
- Date Display Format – Date display format of the user (yyyy-mm-dd, mm/dd/yyyy, dd/mm/yyyy, dd mon yyyy)
- Time Display Format – Time display format of the user (24hr format, 12hr (AM/PM) format)
- Synch Type – Select the type of synch (Linking Records, Linking Waves, Unlinking Waves, Linking Tasks, Unlinking Tasks)
- Reload Links – Drop and reload links for the selected data type
- Append Links – Append new links for the selected data type
- Show Execution Details – Choose if verbose output is displayed during execution (Linking Records, Linking Waves, Unlinking Waves, Linking Tasks, Unlinking Tasks)
- Configure the mapping settings and then click the Close button
- Click the button to run the data mapping (as it would from a cron job)
- Click the button to expand the query to full window mode. Click the button to exit full window mode.
- Use the menu to manage queries
- Ignore from Execution – Ignore a query from execution
- Rename Query – Rename a query
- Move Up – Move a query up in the order
- Move Down – Move a query down in the order
- Delete Query – Delete a query
- Click the button to Quick Save or Full Save the mapping. A Quick Save does not run the query while a Full Save does and can take longer to save depending on the query.
NOTE: The RW Target Table is required to save a mapping. - Use the floating toolbar to format, run, and save the query when you are scrolled down
- Use the editing buttons to format the query
Output
From the Edit Mapping page, you can view the results of a mapping query or set of queries. To view the results:
- Click the button to run the query and preview the output before saving
- Select the number of rows to display from the drop down (100 (default), 500, 1000, All)
- Select the number of rows to display from the drop down (100 (default), 500, 1000, All)
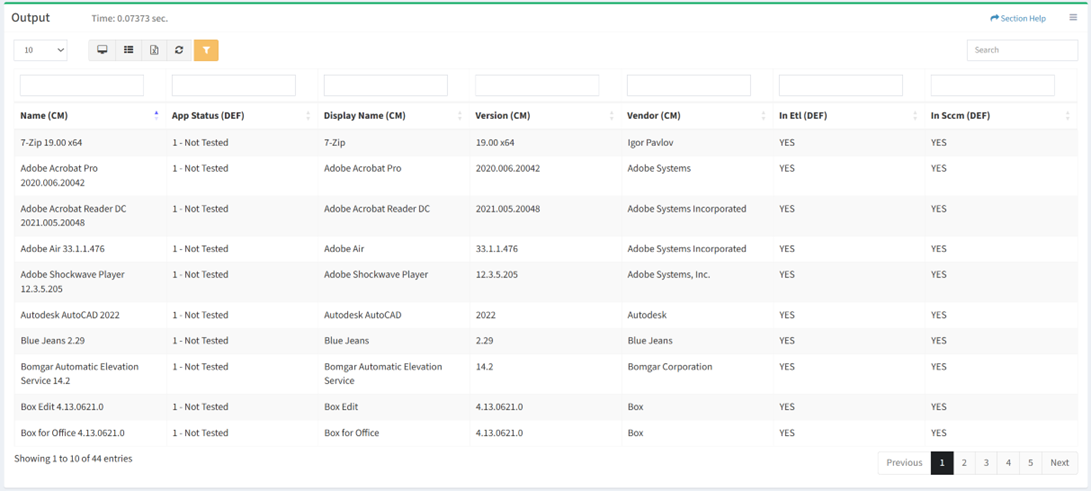
- View the results of the query in the Output window
NOTE: Encrypted data columns are masked to the end user when viewing the output.
Mapping Properties
From the Edit Mapping page, you can edit the mapping properties. To edit the mapping properties:
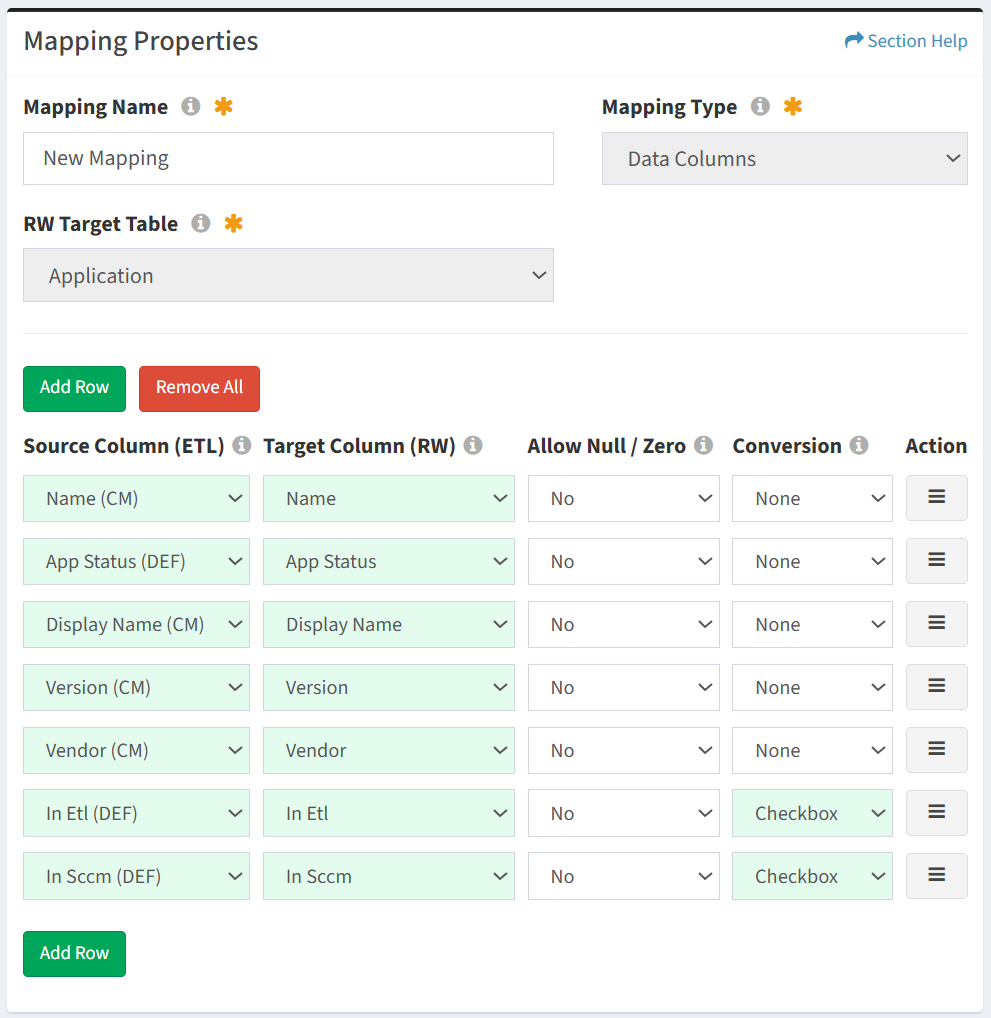
- Edit the mapping properties in the Mapping Properties window
- Mapping Name – Name of the mapping (required)
- Mapping Type – Type of the mapping (Data Columns, Linking Records, Linking Waves, Unlinking Waves, Linking Tasks, Unlinking Tasks)
- RW Target Table – Select ReadyWorks table that is the target of the mapping
- Source Column (ETL) – Select source column of the mapping
NOTE: The Name field of a data record cannot contain the string ” | “. - Target Column (RW) – Select target column of the mapping
- Allow Null / Zero – Choose if value of the mapping can be set to NULL or zero
NOTE: Enable Allow Null to overwrite data when the source changes to NULL (or directly through the SQL statement). When disabled, NULL values are skipped. - Conversion – Select conversion method of the mapping
- Boolean
- Checkbox
- Date
- Datetime
- FQDN
- GUID
- NetBIOS
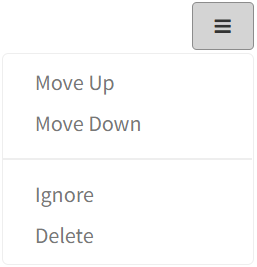
- Use the menu to manage rows
- Move Up – Move a row up in the order
- Move Down – Move a row down in the order
- Ignore – Ignore a row
- Delete – Delete a row
- Add Row – Add new rows for additional mappings
- Remove All – Remove all rows
Settings
From the Edit Mapping page, you can configure the mapping settings. To configure the mapping settings:
- Click the button to bring op the Settings dialog
- Configure the mapping settings and then click the Close button
- Show Data in Output – Choose if data is displayed in output
- Enable Audit – Choose if auditing (logging) is enabled or disabled
- Date Display Format – Date display format of the user (yyyy-mm-dd, mm/dd/yyyy, dd/mm/yyyy, dd mon yyyy)
- Time Display Format – Time display format of the user (24hr format, 12hr (AM/PM) format)
- Synch Type – Select the type of synch (Linking Records, Linking Waves, Unlinking Waves, Linking Tasks, Unlinking Tasks)
- Reload Links – Drop and reload links for the selected data type
- Append Links – Append new links for the selected data type
- Show Execution Details – Choose if verbose output is displayed during execution (Linking Records, Linking Waves, Unlinking Waves, Linking Tasks, Unlinking Tasks)