
Search Knowledge Base by Keyword
-
Introduction
-
Fundamentals
-
My ReadyWorks
-
Analytics
-
-
-
- Available Reports
- All Data Types
- Application Certification Status
- Application Discovery
- Application Group Analysis
- App Group to SCCM Collection Analysis
- Application Install Count
- Application License Management
- Application Usage
- Data Type Column Mappings
- Record Count by Property
- Data Links Count by Data Type
- Build Sheet
- Computer User Assignment
- Delegate Relationships
- ETL5 Staging Data
- Migration Readiness (Basic)
- Migration Readiness (Complex)
- O365 License Management
- O365 Migration Readiness
- Patch Summary
- SCCM OSD Status
- Scheduled Computers by Wave
- Scheduled Users by Manager
- User Migration Readiness
- VIP Users
- Wave & Task Details
- Wave Group
- Windows 10 Applications
- Show all articles ( 14 ) Collapse Articles
-
-
-
-
Orchestration
-
Data
-
-
- View Primary Data
- Record Properties
- Images
- Notes
- Waves
- Tasks
- Attachments
- History
- Rationalization
- QR Code
- Linked Records
- SCCM Add/Remove Programs
- Altiris Add/Remove Programs
- Related Records
- Advanced Search
- Relationship Chart
- Primary Data Permissions
- Show all articles ( 2 ) Collapse Articles
-
Integration
-
-
-
- View Connection
- Connection Properties
- Make Into Connector
- Delete Connection
- Connection Error Settings
- Inbound Jobs
- Outbound Jobs
- New Inbound Job
- New Outbound Job
- Job Error Settings
- Enable Job
- Disable Job
- Edit Inbound Job
- Edit Outbound Job
- Upload File
- Run Inbound Job
- Run Outbound Job
- Set Runtime to Now
- Reset Job
- Delete Job
- Job Log
- Show all articles ( 6 ) Collapse Articles
-
-
- View Connector
- Connector Properties
- Authentication Methods
- New Authentication Method
- Authentication Method Error Settings
- Edit Authentication Method
- Delete Authentication Method
- Fields
- Edit Field
- Inbound Job Fields
- Edit Inbound Job Field
- Inbound Job Templates
- New Inbound Job Template
- Job Template Error Settings
- Edit Inbound Job Template
- Delete Inbound Job Template
- Outbound Job Fields
- Edit Outbound Job Field
- Outbound Job Templates
- New Outbound Job Template
- Edit Outbound Job Template
- Delete Outbound Job Template
- Show all articles ( 7 ) Collapse Articles
-
-
- ETL5 Connector Info
- Absolute
- Azure Active Directory
- Comma-Separated Values (CSV) File
- Generic Rest JSON API
- Generic Rest XML API
- Ivanti (Landesk)
- JAMF
- JSON Data (JSON) File
- MariaDB
- Microsoft Endpoint Manager: Configuration Manager
- Microsoft SQL
- Microsoft Intune
- Oracle MySQL
- PostgreSQL
- Pure Storage
- ServiceNow
- Tanium
- XML Data (XML) File
- JetPatch
- Lenovo XCLarity
- Nutanix Move
- Nutanix Prism
- Nutanix Prism - Legacy
- RVTools
- Simple Object Access Protocol (SOAP)
- VMware vCenter
- VMware vCenter SOAP
- Show all articles ( 13 ) Collapse Articles
-
-
Admin
-
-
-
- Modules
- Attachments
- Bulk Edit
- Data Generator
- Data Mapping
- Data Quality
- ETL
- Form Builder
- Images
- Multi-Factor Authentication
- Notifications
- Rationalization
- Relationship Chart
- Reports
- Rules
- Single Sign-On
- T-Comm
- User Experience
- Show all articles ( 4 ) Collapse Articles
-
-
API
-
Administration
-
FAQs
-
Solutions
Reschedule Button
< Back
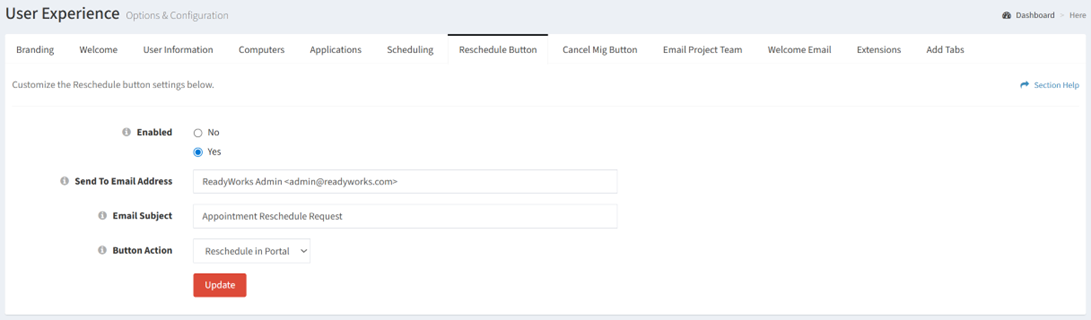
The Reschedule Button configuration tab provides the ability to configure the behavior of the Reschedule button on the Scheduling tab in the portal. Configuration options include enabling or disabling the button, choosing the action of the button (send email or reschedule in the same wave), and the reschedule request send to email address and subject. The Scheduling tab allows a user to schedule their appointment.
Configuration
From the Reschedule Button configuration tab, you can configure the behavior of the button in the portal. To configure:
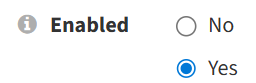
- Choose if the Reschedule button is enabled or not from the Enabled radio button
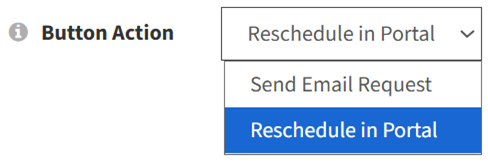
- Select the action of the reschedule button from the Button Action drop down. The button can either send an email request or allow the user to reschedule in the portal.
- Enter the send to email address of reschedule requests in the Send To Email Address text box

- Enter the subject of reschedule requests in the Email Subject text box

- Click the Update button to save your changes. Navigate to another page to cancel your changes.
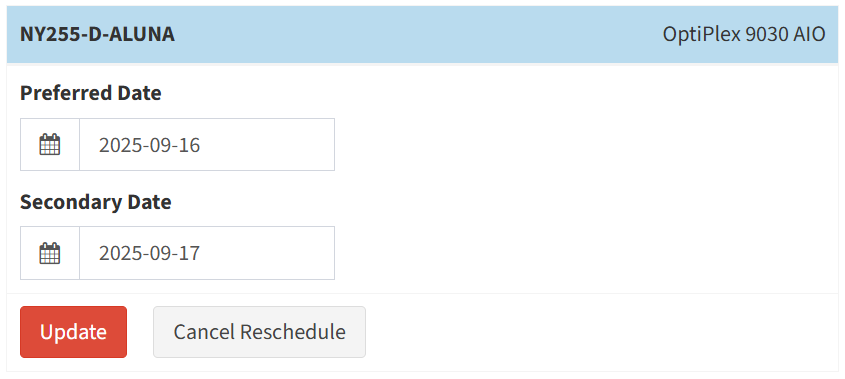
NOTE: Each tab must be updated individually. Updating from a different tab without first updating the Reschedule Button configuration tab will result in the loss of your changes. - The view of the Scheduling widget in the portal with the Reschedule button enabled is shown below:
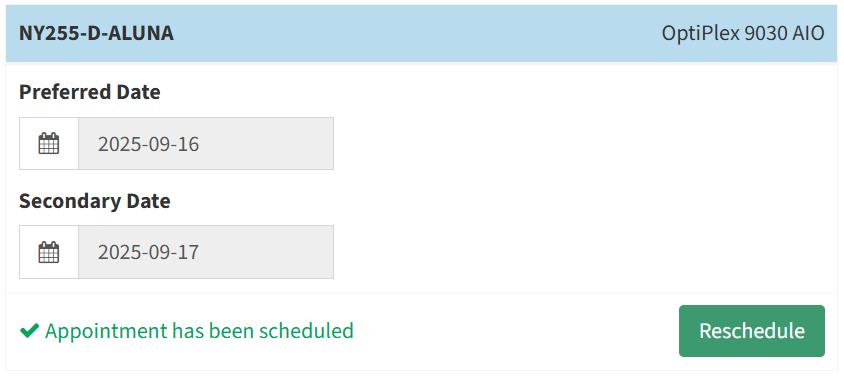
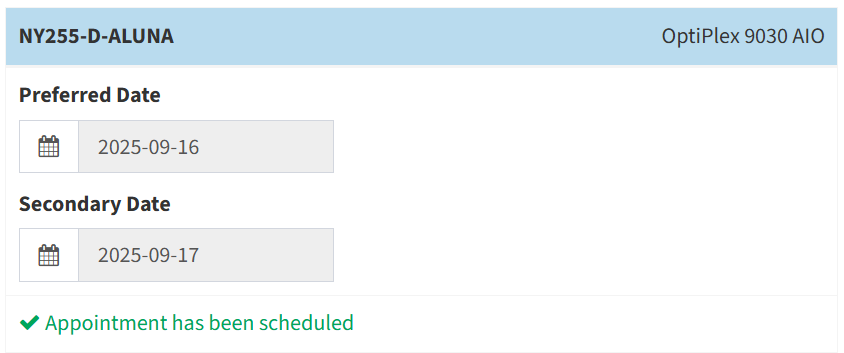
- The view when the Reschedule button is clicked on the Scheduling tab in the portal is shown below:
NOTE: The Scheduled field is set to YES and Scheduled Date field is set to the Preferred Date on the User data type (if configured ) when a user reschedules their appointment in the portal. - If rescheduling through email is enabled, a prepopulated email will be generated. Add any details and the Send button to send the email to the project team.
- An example reschedule email request is shown below:
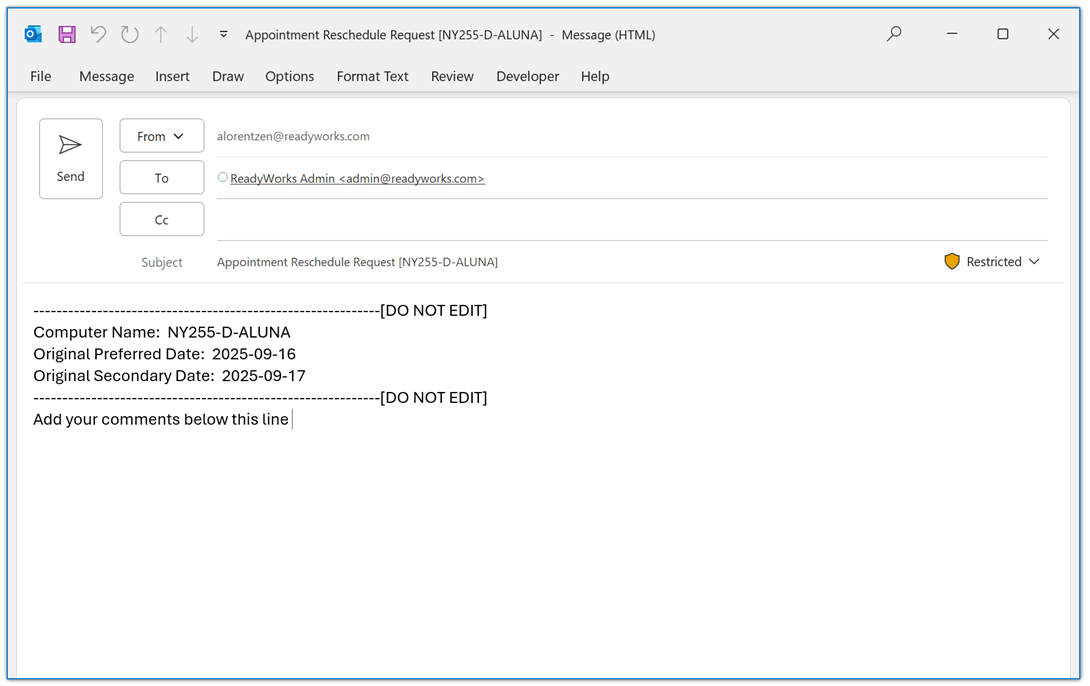
- An example reschedule email request is shown below:
- The view of the Scheduling widget in the portal with the Reschedule button disabled is shown below:
- The view of the Reschedule Button configuration tab with the Enabled radio button set to No is shown below:
