Search Knowledge Base by Keyword
-
Introduction
-
Fundamentals
-
Favorites
-
Dashboards
-
Attachments
-
Reports
-
- Available Reports
- All Asset Types
- Application Certification Status
- Application Discovery
- Application Group Analysis
- App Group to SCCM Collection Analysis
- Application Install Count
- Application License Management
- Application Usage
- Asset Column Mappings
- Asset Count by Property
- Asset Links Count by Asset Type
- Build Sheet
- Computer User Assignment
- Delegate Relationships
- ETL Synch Data
- ETL5 Staging Data
- Migration Readiness (Basic)
- Migration Readiness (Complex)
- O365 License Management
- O365 Migration Readiness
- Patch Summary
- SCCM OSD Status
- Scheduled Computers by Wave
- Scheduled Users by Manager
- User Migration Readiness
- VIP Users
- Wave & Task Details
- Wave Group
- Windows 10 Applications
- Show all articles ( 15 ) Collapse Articles
-
Self Service
-
Workflow
-
Assets
-
- View Asset
- Asset Properties
- Images
- Notes
- Waves
- Tasks
- Attachments
- History
- Rationalization
- QR Code
- Linked Assets
- SCCM Add/Remove Programs
- Altiris Add/Remove Programs
- Related Assets
- Relationship Chart
- Permissions
- Show all articles ( 1 ) Collapse Articles
-
Event Logs
-
Users & Groups
-
Asset Types
-
Charts & Dashboards
-
Options
-
- Modules
- Analytics
- Asset Images
- Asset Rationalization
- Asset Rules
- Attachments
- Bulk Edit
- Data Generator
- Data Mapping
- ETL
- Form Builder
- Multi-Factor Authentication
- Relationship Chart
- Reports
- Self Service
- Single Sign-On
- T-Comm
- Show all articles ( 3 ) Collapse Articles
-
Module Settings
-
-
-
- View Connection
- Connection Properties
- Make Into Connector
- Delete Connection
- Inbound Jobs
- Outbound Jobs
- New Inbound Job
- New Outbound Job
- Enable Job
- Disable Job
- Edit Inbound Job
- Edit Outbound Job
- Upload File
- Run Inbound Job
- Run Outbound Job
- Set Runtime to Now
- Reset Job
- Delete Job
- Job Log
- Show all articles ( 4 ) Collapse Articles
-
-
- View Connector
- Connector Properties
- Authentication Methods
- New Authentication Method
- Edit Authentication Method
- Delete Authentication Method
- Fields
- Edit Field
- Inbound Job Fields
- Edit Inbound Job Field
- Inbound Job Templates
- New Inbound Job Template
- Edit Inbound Job Template
- Delete Inbound Job Template
- Outbound Job Fields
- Edit Outbound Job Field
- Outbound Job Templates
- New Outbound Job Template
- Edit Outbound Job Template
- Delete Outbound Job Template
- Show all articles ( 5 ) Collapse Articles
-
-
- ETL5 Connectors
- Absolute
- Azure Active Directory
- Comma-Separated Values (CSV) File
- Generic Rest JSON API
- Generic Rest XML API
- Ivanti (Landesk)
- JAMF
- JSON Data (JSON) File
- MariaDB
- Microsoft Endpoint Manager: Configuration Manager
- Microsoft SQL
- Microsoft Intune
- Oracle MySQL
- PostgreSQL
- Pure Storage
- ServiceNow
- Tanium
- XML Data (XML) File
- Show all articles ( 4 ) Collapse Articles
-
-
API & Stored Procedures
-
Administration
-
FAQs
Scheduling
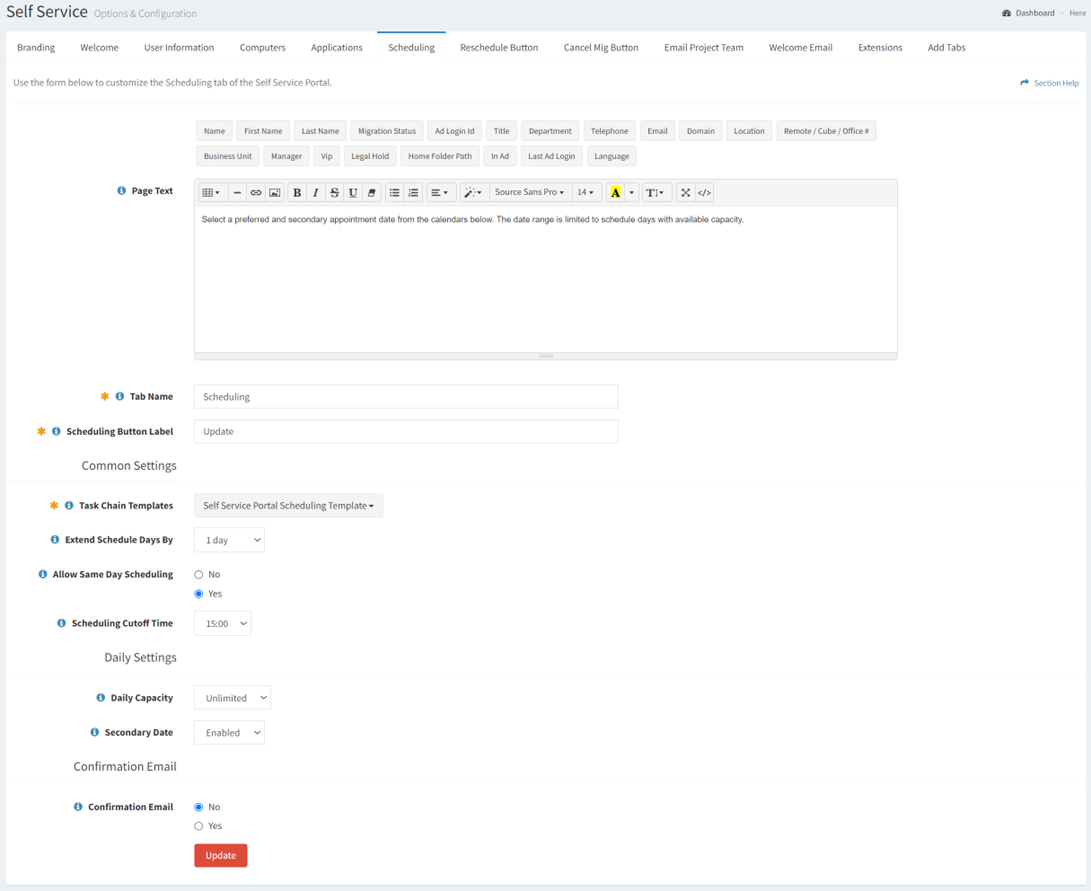
The Scheduling configuration tab provides the ability configure the view displayed on the Scheduling tab in the portal. Configuration options include updating the text displayed in the portal, updating the tab name, updating the scheduling button label, the ability to select the global scheduling settings, enabling or disabling confirmation emails and the confirmation email send from email address, CC email address, BCC email address, subject and body. The Scheduling tab allows a user to schedule, reschedule or cancel their migration date if configured.
Page Text
From the Scheduling configuration tab, you can update the text displayed in the portal. To update:
- Enter text in the Page Text Utilize HTML elements to augment the text (e.g. <br> for line break)

- Use the placeholder buttons to add variables for User asset properties to the text box (e.g. Name) to personalize the tab for each portal user

- Click the Update button to save your changes. Navigate to another page to cancel your changes.
NOTE: Each tab must be updated individually. Updating from a different tab without first updating the Scheduling configuration tab will result in the loss of your changes. - The view of the Scheduling tab in the portal is shown below:

NOTE: The Scheduled field is set to YES and Scheduled Date field is set to the Preferred Date on the User asset type (if available) when a user schedules their appointment in the portal. - The view of the Scheduling tab in the portal with no configured schedule days is shown below:

Tab Name
From the Scheduling configuration tab, you can update the tab name displayed in the portal. To update:
- Enter the tab name in the Tab Name text box

- Click the Update button to save your changes. Navigate to another page to cancel your changes.
NOTE: Each tab must be updated individually. Updating from a different tab without first updating the Scheduling configuration tab will result in the loss of your changes.
Scheduling Button Label
From the Scheduling configuration tab, you can update the scheduling button label displayed in the portal. To update:
- Enter the scheduling button label in the Scheduling Button Label text box

- Click the Update button to save your changes. Navigate to another page to cancel your changes.
NOTE: Each tab must be updated individually. Updating from a different tab without first updating the Scheduling configuration tab will result in the loss of your changes.
Global Scheduling Settings
From the Scheduling configuration tab, you can configure the global scheduling settings. To configure:
- Choose which Task Chain Templates are loaded into waves when a user schedules in the portal by selecting from the Task Chain Templates drop down. The system default template is Self Service Portal Scheduling Template. Create new task chain templates to add to the list of available templates to choose from.

- Select the number of days beyond the wave end goal to allow user calendar scheduling from the Extend Schedule Days By drop down. The default is 0 days.


- Choose if same day scheduling is allowed or not from the Allow Same Day Scheduling radio button

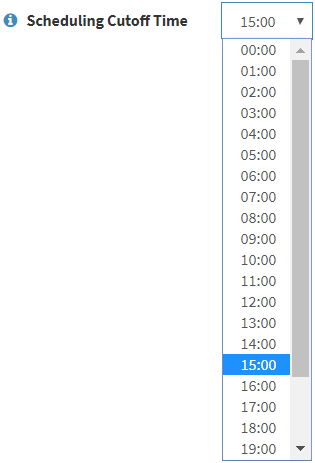
- Select the time when scheduling will be cutoff from the Scheduling Cutoff Time drop down
- Select the number of appointments allowed to be scheduled on any day from the Daily Capacity drop down. The default is Unlimited.


- Choose if the Secondary Date selector is available or not from the Secondary Date drop down

- Click the Update button to save your changes. Navigate to another page to cancel your changes.
NOTE: Each tab must be updated individually. Updating from a different tab without first updating the Scheduling configuration tab will result in the loss of your changes.
Confirmation Email
From the Scheduling configuration tab, you can configure the behavior of the confirmation emails when users schedule in the portal. To configure:
- Choose if the Confirmation Email is enabled or not from the Confirmation Email radio button

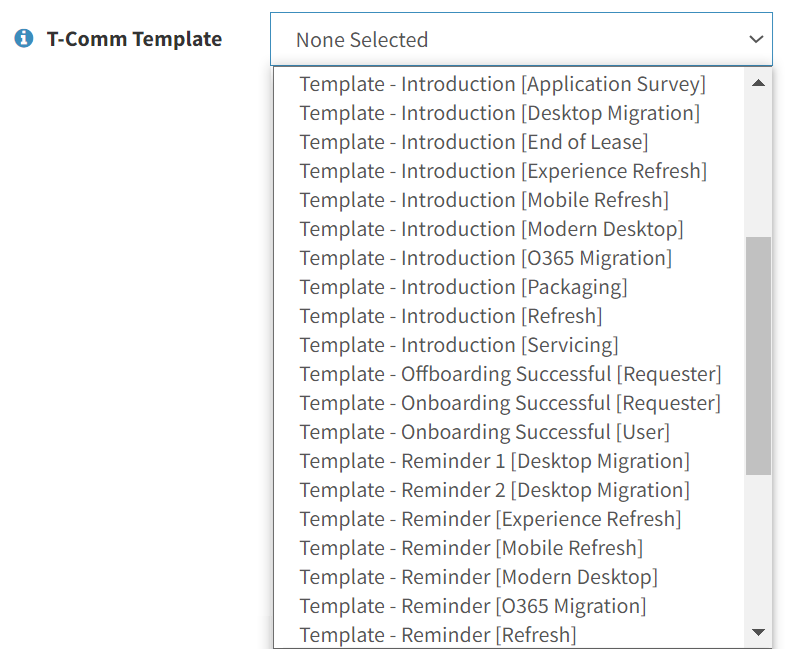
- Select the T-Comm template of confirmation emails from the T-Comm Template drop down
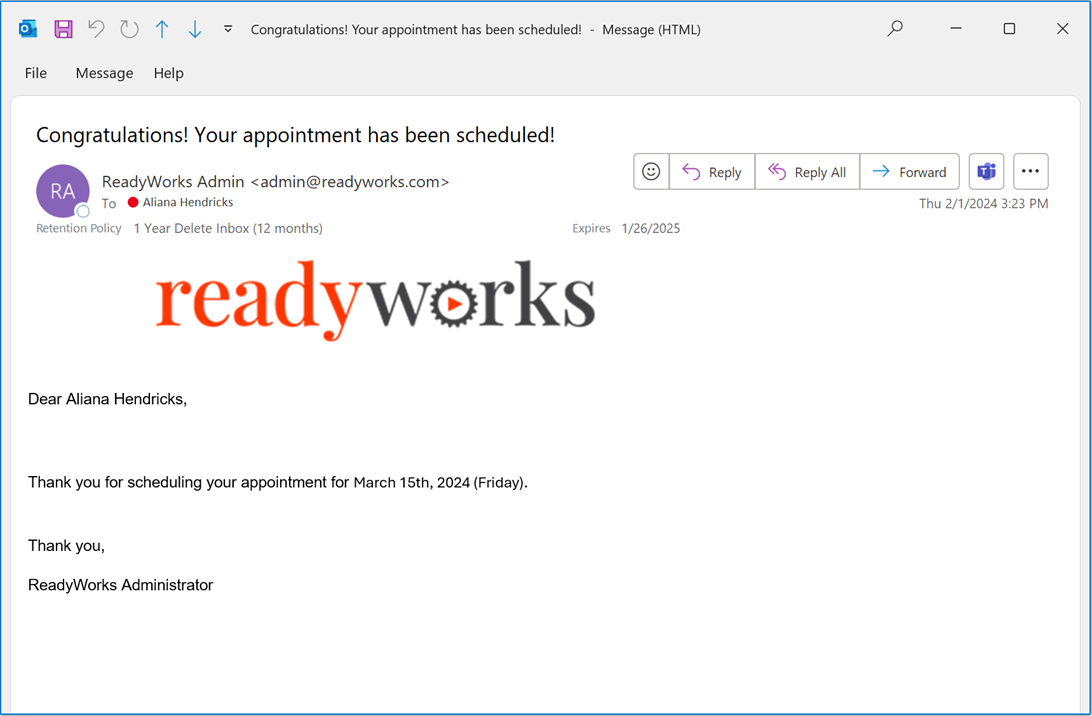
NOTE: An ICS attachment can be sent with confirmation emails by enabling Include ICS Attachment when creating a T-Comm template. - An example confirmation email is shown below:
- The view of the Confirmation Email configuration tab with the Enabled radio button set to No is shown below:

Confirmation Email (Deprecated in version 7.6.0124)
NOTE: Editing the Confirmation Email on the Scheduling tab was deprecated in version 7.6.0124.
From the Scheduling configuration tab, you can configure the behavior of the confirmation emails when users schedule in the portal. To configure:
- Choose if the Confirmation Email is enabled or not from the Confirmation Email radio button

- Enter the send from email address of confirmation emails in the From Email Address text box

- Enter the recipient to be copied on confirmation emails in the CC Email text box

- Enter the recipient to be blind copied on confirmation emails in the BCC Email text box

- Enter the subject of confirmation emails in the Email Subject text box

- Enter the body of confirmation emails in the Email Body text box

- Utilize placeholders in the email body to personalize confirmation emails
Placeholder Icon Variable Description Full Name 
%[name]% Name field of the portal user First Name 
%[first_name]% First Name field of the portal user Last Name 
%[last_name]% Last Name field of the portal user Email 
%[email]% Email field of the portal user Asset Name 
%[asset_name]% Name field of the portal user’s asset Start Goal Date 
%[start_goal]% Start Goal date of the scheduled task Start Goal Time N/A %[start_goal_time]% Start Goal time of the scheduled task End Goal Date 
%[end_goal]% End Goal date of the scheduled task End Goal Time N/A %[end_goal_time]% End Goal time of the scheduled task Group Name 
%[group_name]% Name field of the scheduled task Image 
Not applicable Upload an image file or link to display in the email - Click the Update button to save your changes. Navigate to another page to cancel your changes.
NOTE: Each tab must be updated individually. Updating from a different tab without first updating the Scheduling configuration tab will result in the loss of your changes. - An example confirmation email is shown below:
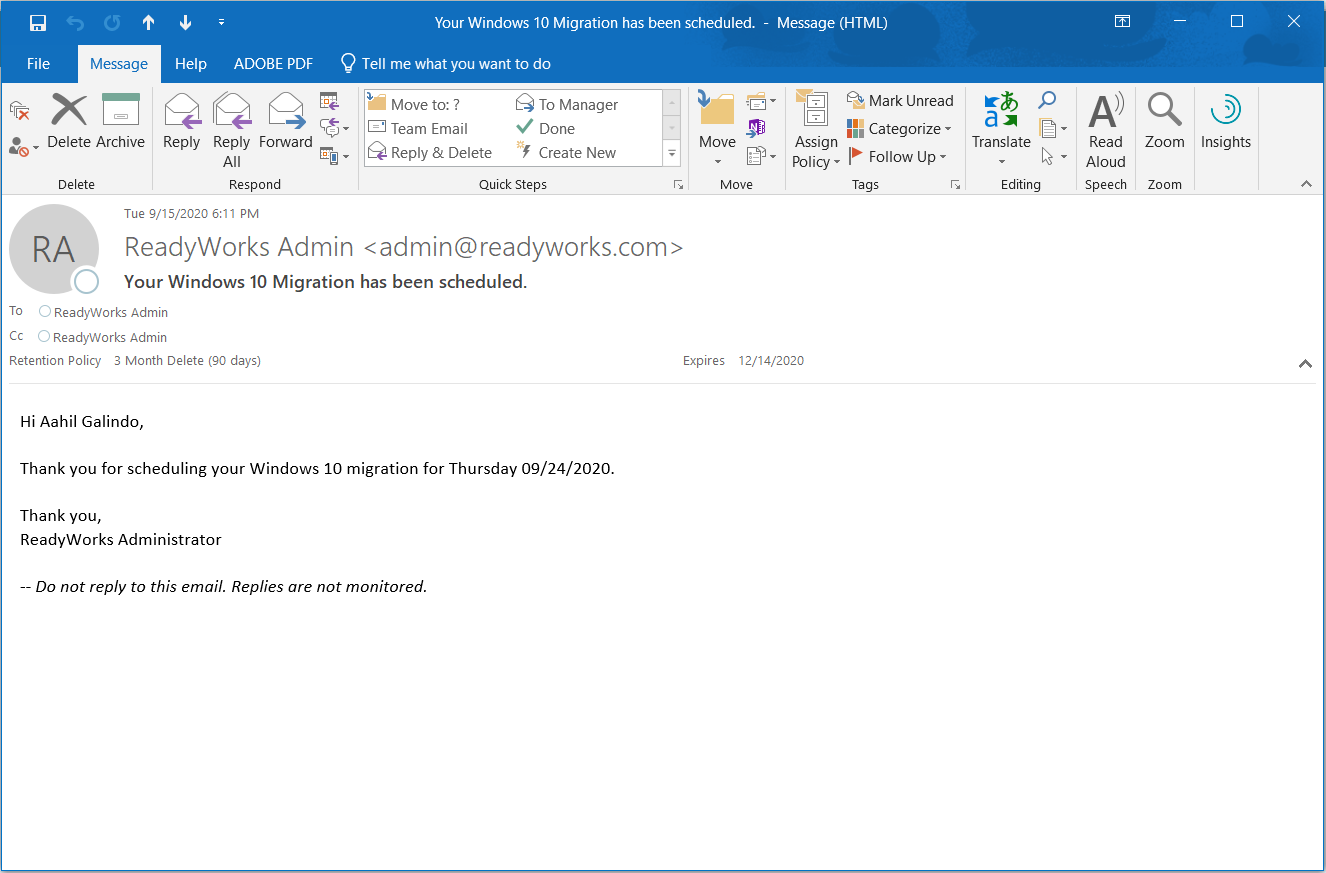
- The view of the Confirmation Email configuration tab with the Enabled radio button set to No is shown below:


