Search Knowledge Base by Keyword
-
Introduction
-
Fundamentals
-
Favorites
-
Dashboards
-
Attachments
-
Reports
-
- Available Reports
- All Asset Types
- Application Certification Status
- Application Discovery
- Application Group Analysis
- App Group to SCCM Collection Analysis
- Application Install Count
- Application License Management
- Application Usage
- Asset Column Mappings
- Asset Count by Property
- Asset Links Count by Asset Type
- Build Sheet
- Computer User Assignment
- Delegate Relationships
- ETL Synch Data
- ETL5 Staging Data
- Migration Readiness (Basic)
- Migration Readiness (Complex)
- O365 License Management
- O365 Migration Readiness
- Patch Summary
- SCCM OSD Status
- Scheduled Computers by Wave
- Scheduled Users by Manager
- User Migration Readiness
- VIP Users
- Wave & Task Details
- Wave Group
- Windows 10 Applications
- Show all articles ( 15 ) Collapse Articles
-
Self Service
-
Workflow
-
Assets
-
- View Asset
- Asset Properties
- Images
- Notes
- Waves
- Tasks
- Attachments
- History
- Rationalization
- QR Code
- Linked Assets
- SCCM Add/Remove Programs
- Altiris Add/Remove Programs
- Related Assets
- Relationship Chart
- Permissions
- Show all articles ( 1 ) Collapse Articles
-
Event Logs
-
Users & Groups
-
Asset Types
-
Charts & Dashboards
-
Options
-
- Modules
- Analytics
- Asset Images
- Asset Rationalization
- Asset Rules
- Attachments
- Bulk Edit
- Data Generator
- Data Mapping
- ETL
- Form Builder
- Multi-Factor Authentication
- Relationship Chart
- Reports
- Self Service
- Single Sign-On
- T-Comm
- Show all articles ( 3 ) Collapse Articles
-
Module Settings
-
-
-
- View Connection
- Connection Properties
- Make Into Connector
- Delete Connection
- Inbound Jobs
- Outbound Jobs
- New Inbound Job
- New Outbound Job
- Enable Job
- Disable Job
- Edit Inbound Job
- Edit Outbound Job
- Upload File
- Run Inbound Job
- Run Outbound Job
- Set Runtime to Now
- Reset Job
- Delete Job
- Job Log
- Show all articles ( 4 ) Collapse Articles
-
-
- View Connector
- Connector Properties
- Authentication Methods
- New Authentication Method
- Edit Authentication Method
- Delete Authentication Method
- Fields
- Edit Field
- Inbound Job Fields
- Edit Inbound Job Field
- Inbound Job Templates
- New Inbound Job Template
- Edit Inbound Job Template
- Delete Inbound Job Template
- Outbound Job Fields
- Edit Outbound Job Field
- Outbound Job Templates
- New Outbound Job Template
- Edit Outbound Job Template
- Delete Outbound Job Template
- Show all articles ( 5 ) Collapse Articles
-
-
- ETL5 Connectors
- Absolute
- Azure Active Directory
- Comma-Separated Values (CSV) File
- Generic Rest JSON API
- Generic Rest XML API
- Ivanti (Landesk)
- JAMF
- JSON Data (JSON) File
- MariaDB
- Microsoft Endpoint Manager: Configuration Manager
- Microsoft SQL
- Microsoft Intune
- Oracle MySQL
- PostgreSQL
- Pure Storage
- ServiceNow
- Tanium
- XML Data (XML) File
- Show all articles ( 4 ) Collapse Articles
-
-
API & Stored Procedures
-
Administration
-
FAQs
New Attachment
< Back
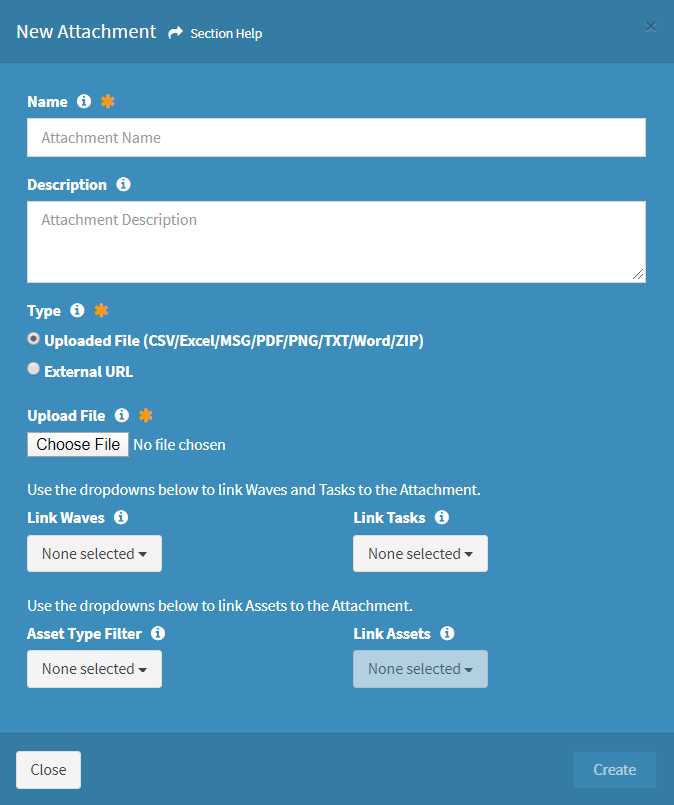
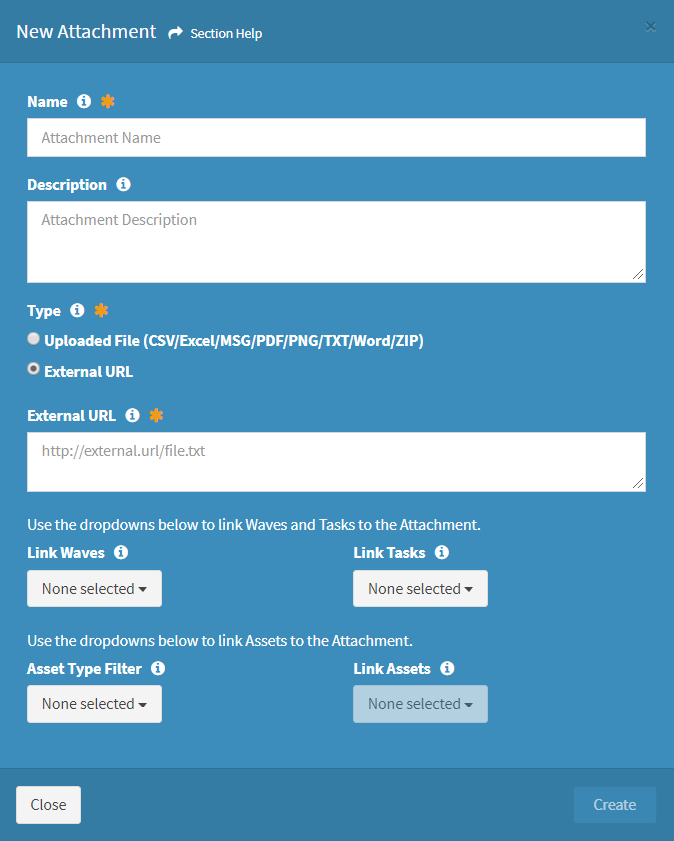
From the Attachments page, you can create attachments. To create:
- Click the New Attachment button to bring up the New Attachment dialog
- Enter the properties of the new attachment


- Name – Name of the attachment (required)
- Description – Description of the attachment (optional)
- Type – Select the type of attachment (required)
- Different options are available depending on the type of attachment:
- Uploaded File – Browse for a file to upload
NOTE: File types that can be uploaded are managed by ReadyWorks Support. Contact ReadyWorks Support to add additional file types. - External URL – Enter the URL for the file (on a document repository for example). The URL must include http:// or https:// for the attachment to be created.
- Uploaded File – Browse for a file to upload
- Different options are available depending on the type of attachment:
- Link Waves – Select waves from the drop down to link to the attachment (optional)
- Link Tasks – Select tasks from the drop down to link to the attachment (optional)
- Asset Type Filter – Select an asset type to filter the Link Assets drop down (optional)
- Once an asset type is selected the Link Assets button will become available (ungrayed)
- Link Assets – Select assets from the drop down to link to the attachment (optional)
- Click the Create button when finished to create the attachment. You will be redirected back to the Attachments page. Click the Close button to cancel the operation.
New Attachment (from Asset, Wave or Task)
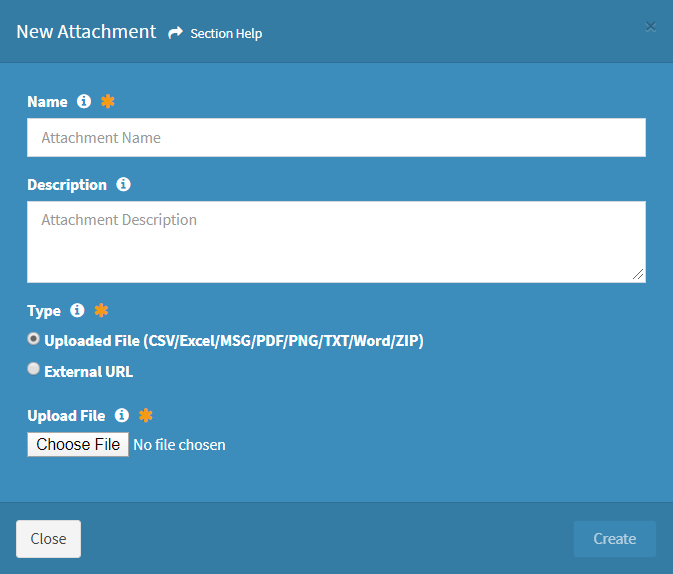
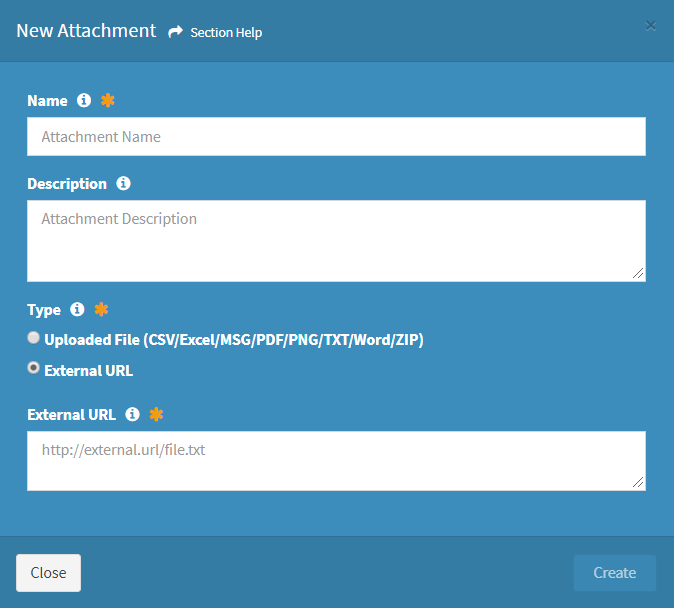
From the Attachment tab on an asset, wave or task, you can create (and link) attachments to the asset, wave or task. To create:
- Click the New Attachment button to bring up the New Attachment dialog
- Enter the properties of the new attachment


- Name – Name of the attachment (required)
- Description – Description of the attachment (optional)
- Type – Select the type of attachment (required)
- Different options are available depending on the type of attachment:
- Uploaded File – Browse for a file to upload
NOTE: File types that can be uploaded are managed by ReadyWorks Support. Contact ReadyWorks Support to add additional file types. - External URL – Enter the URL for the file (on a document repository for example). The URL must include http:// or https:// for the attachment to be created.
- Uploaded File – Browse for a file to upload
- Different options are available depending on the type of attachment:
- Click the Create button when finished to create the attachment. Click the Close button to cancel the operation.
Tags:

